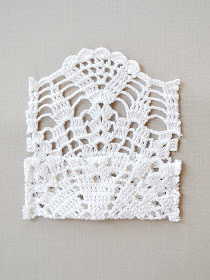
Here's the tutorial! I made a much smaller envelope this time and it's the perfect size to tuck a gift card into. Pretty appropriate for this time of year! With just a couple of supplies and a few steps - you can whip one up in no time - let's get started!
the supply list:
1 round doily
thread and needle
giftcard
button

Step 1. Place the gift card in the middle of the doily as a measuring guide. (You'll want the doily, when folded up at the bottom, to cover about 3/4 of the giftcard.) Cut the bottom of the doily off.

Step 2. Fold the bottom of the doily up covering most of the giftcard and cut the edge of the doily, leaving about a 1/4 inch of doily on either edge.


Step 3. The edges of the doily are going to be sewn, because the doily that I'm using is a loosely crocheted pattern, I used a pin to hold the edge together. The pin will help stop the doily from shifting too much during the sewing process!

Step 4. Sew the edge of the doily. I went back and forth, about 3 times, sewing down the edge of the doily and then back up again to make sure I had sewn the edge completely closed.


Step 5. Repeat steps 2-4 with the opposite side of the doily.

Step 6. Using a needle and thread, sew a button onto the top front of the doily.


* To crease the edges of the doily use a hot iron and press along the edges. Just be careful to not touch the iron to the button!


The size of your envelope will depend on the doily size but I have to admit that the smaller envelope was my fav. It makes giving a gift card this holiday season a little more exciting!

ohh thank you.. I love love this!
ReplyDeleteMy oh my, how cute is that!!!
ReplyDeleteThank you for sharing! :-)
I love this! Thank you so much for sharing how it's made!!
ReplyDeleteCool tutorial! If only I knew how to use a sewing machine! :/
ReplyDeleteHope you're having a great week! ;D
Miki.
your effort make it easy to follow..I will use it Gift Card envelopes when i needed.
ReplyDelete